代码实战 | cfgrib外的新选择,如何以rust为后端加速读取grib数据

代码实战 | cfgrib外的新选择,如何以rust为后端加速读取grib数据

用户11172986
发布于 2026-06-24 11:54:16
发布于 2026-06-24 11:54:16
代码实战 | cfgrib外的新选择,如何以rust为后端加速读取grib数据
作者:气 python 风雨 运行环境:Python 3.11 + gribberish + xarray + matplotlib + cartopy 示例数据:本目录下的
surface_vars.grib2、t_q_levels.grib2
1. 前言
GRIB2 是气象数值模式产品的事实标准格式,但“读 GRIB”这件事历来不算轻松:cfgrib 依赖 eccodes,安装不轻松;pygrib 对 GRIB1/GRIB2 的 API 不统一;
最近在github发现一个用 Rust 重写的 GRIB 解析库 gribberish,它通过 PyO3 暴露 Python 接口,并提供了 xarray 后端,既保留了 Rust 的运行速度,又能让我们像读 NetCDF 一样读 GRIB2。本教程就用手头的 GRIB2 文件,完整走一遍安装、读取、可视化和横向对比流程。
!pip install gribberish -i https://pypi.mirrors.ustc.edu.cn/simple/
Looking in indexes: https://pypi.mirrors.ustc.edu.cn/simple/
Collecting gribberish
  Downloading https://mirrors.ustc.edu.cn/pypi/packages/bb/89/7207c7a1daddfef6db5ff1c2a4b7fb6f8adfee185f96e89778c4c30d38c5/gribberish-0.30.3-cp311-cp311-manylinux_2_17_x86_64.manylinux2014_x86_64.whl (699 kB)
     ━━━━━━━━━━━━━━━━━━━━━━━━━━━━━━━━━━━━━━━ 699.0/699.0 kB 4.3 MB/s eta 0:00:00
[?25hCollecting numpy>=2 (from gribberish)
  Downloading https://mirrors.ustc.edu.cn/pypi/packages/02/03/74fe2a4cb3817d94d86402f2506554130a2f01414e299b5a843e5a8a957f/numpy-2.4.6-cp311-cp311-manylinux_2_27_x86_64.manylinux_2_28_x86_64.whl (16.9 MB)
     ━━━━━━━━━━━━━━━━━━━━━━━━━━━━━━━━━━━━━━━━ 16.9/16.9 MB 12.3 MB/s eta 0:00:000:00:020m
[?25hInstalling collected packages: numpy, gribberish
  Attempting uninstall: numpy
    Found existing installation: numpy 1.26.4
    Uninstalling numpy-1.26.4:
      Successfully uninstalled numpy-1.26.4
ERROR: pip's dependency resolver does not currently take into account all the packages that are installed. This behaviour is the source of the following dependency conflicts.
esmpy 8.4.1 requires pytest-json-report, which is not installed.
wrf-python 1.3.4.1 requires basemap, which is not installed.
scipy 1.14.1 requires numpy<2.3,>=1.23.5, but you have numpy 2.4.6 which is incompatible.
numba 0.59.1 requires numpy<1.27,>=1.22, but you have numpy 2.4.6 which is incompatible.
pyninjotiff 0.4.0 requires dask[array]<2022.0.0,>=2021.9.1, but you have dask 2024.8.1 which is incompatible.
pyninjotiff 0.4.0 requires xarray<0.20.0,>=0.19.0, but you have xarray 2024.3.0 which is incompatible.
meteva 1.9.1.2 requires numpy<2.0.0,>=1.12.1, but you have numpy 2.4.6 which is incompatible.
geocat-comp 2025.1.0 requires numpy<2.0, but you have numpy 2.4.6 which is incompatible.
wradlib 2.4.0 requires xarray>=2024.10.0, but you have xarray 2024.3.0 which is incompatible.
wradlib 2.4.0 requires xradar>=0.8.0, but you have xradar 0.7.0 which is incompatible.
xeofs 3.0.4 requires xarray>=2024.10.0, but you have xarray 2024.3.0 which is incompatible.
gsw-xarray 0.4.0 requires cf-xarray<0.8.0,>=0.7.4, but you have cf-xarray 0.10.0 which is incompatible.
scikit-image 0.25.0 requires pillow>=10.1, but you have pillow 9.4.0 which is incompatible.
Successfully installed gribberish-0.30.3 numpy-2.4.6
2. 学习目标
读完本教程,你将能够:
- 在本地环境中安装
gribberish及其可选依赖。 - 使用 xarray 后端一键加载 GRIB2 文件。
- 使用直接 API(
parse_grib_dataset、parse_grib_array)灵活提取单条消息。 - 用 cartopy 绘制全球/区域气象场。
- 对
gribberish、cfgrib、pygrib、eccodes有大概的印象
import sys
import gribberish
import xarray as xr

print("Python:", sys.version)
print("gribberish:", gribberish.__version__)
print("xarray:", xr.__version__)
3. gribberish 简介
gribberish 由 Matthew Iannucci 开发,核心是用 Rust 实现的 GRIB1/GRIB2 解码器,Python 端通过 maturin/PyO3 打包。它的设计重点是:
- 快:Rust 实现,批量消息解析显著快于纯 Python 绑定。
- 轻:不强制依赖 eccodes,pip 安装即可获得预编译 wheel。
- 云友好:提供 Zarr codec 与 VirtualiZarr 解析器,适合构建 Kerchunk/虚拟数据集。
- xarray 原生:注册为 xarray 引擎
gribberish,坐标识别符合 CF 约定。 - 项目主页:https://github.com/mpiannucci/gribberish
- PyPI:https://pypi.org/project/gribberish/
- 官方文档:https://mpiannucci.github.io/gribberish/
4. 环境准备
本次使用标准库
venv创建虚拟环境。若你已安装uv,可直接用uv venv与uv pip install替换下方命令。
# 创建并激活虚拟环境
python3 -m venv .venv_gribberish
source .venv_gribberish/bin/activate

升级 pip

python -m pip install --upgrade pip

安装 gribberish + xarray 后端 + 可视化依赖

pip install "gribberish[xarray]" matplotlib cartopy jupyterlab

可选:用于性能对比

pip install cfgrib
5. 方式一:xarray 后端读取(推荐)
只要指定 engine="gribberish",xarray 就会自动把 GRIB2 消息合并成 Dataset。坐标(time、latitude、longitude、isobar)和变量名都按 CF 约定生成。
# 读取地面变量文件(2 m 温度、露点、地面气压)
ds_surf = xr.open_dataset("/home/mw/input/grib3975/surface_vars.grib2", engine="gribberish")
ds_surf
# 快速查看每个变量的统计信息
for var in ds_surf.data_vars:
    arr = ds_surf[var].values
    print(f"{var}: shape={arr.shape}, min={arr.min():.2f}, max={arr.max():.2f}, mean={arr.mean():.2f}")
dpt: shape=(1, 721, 1440), min=205.34, max=302.77, mean=275.34
tmp: shape=(1, 721, 1440), min=205.34, max=317.24, mean=280.12
pres: shape=(1, 721, 1440), min=48886.14, max=105974.14, mean=96584.86
# 读取多等压面层文件(温度与比湿)
ds_lev = xr.open_dataset("/home/mw/input/grib3975/t_q_levels.grib2", engine="gribberish")
print(ds_lev)
print("\n等压面层 (hPa):", ds_lev["isobar"].values / 100)
<xarray.Dataset> Size: 66MB
Dimensions:    (time: 1, isobar: 4, latitude: 721, longitude: 1440)
Coordinates:
  * time       (time) datetime64[ns] 8B 2026-05-23T06:00:00
  * isobar     (isobar) float64 32B 3e+04 5e+04 7e+04 8.5e+04
  * latitude   (latitude) float64 6kB 90.0 89.75 89.5 ... -89.5 -89.75 -90.0
  * longitude  (longitude) float64 12kB 180.0 180.2 180.5 ... 179.2 179.5 179.8
Data variables:
    tmp        (time, isobar, latitude, longitude) float64 33MB ...
    spfh       (time, isobar, latitude, longitude) float64 33MB ...
Attributes:
    meta:     Generated with gribberishpy

等压面层 (hPa): [300. 500. 700. 850.]
/opt/conda/lib/python3.11/site-packages/gribberish/gribberish_backend.py:50: UserWarning: Converting non-nanosecond precision datetime values to nanosecond precision. This behavior can eventually be relaxed in xarray, as it is an artifact from pandas which is now beginning to support non-nanosecond precision values. This warning is caused by passing non-nanosecond np.datetime64 or np.timedelta64 values to the DataArray or Variable constructor; it can be silenced by converting the values to nanosecond precision ahead of time.
  return xr.Dataset(
6. 方式二:直接 API 读取(灵活、低开销)
如果你不想引入 xarray,或者只想按消息偏移量快速抽取数组,可使用底层 API:
gribberish.parse_grib_dataset(raw):返回整个文件的数据集字典,包含attrs、coords、data_vars、groups。gribberish.parse_grib_mapping(raw):返回消息键到(key, offset, metadata)的映射。gribberish.parse_grib_array(raw, offset):从指定字节偏移处解码一条消息,返回一维 numpy 数组,按shapereshape 即可。
当同一份文件中存在冲突的超立方体(例如同一变量既有单层又有多层,或既有瞬时场又有累积场)时,
parse_grib_dataset会把它们拆成嵌套groups,行为与cfgrib的filter_by_keys类似。
import gribberish
import numpy as np

with open("/home/mw/input/grib3975/surface_vars.grib2", "rb") as f:
    raw = f.read()

# 1. 解析整个数据集结构
dataset = gribberish.parse_grib_dataset(raw)
print("变量:", list(dataset["data_vars"].keys()))
print("坐标:", list(dataset["coords"].keys()))

# 2. 建立消息偏移映射
mapping = gribberish.parse_grib_mapping(raw)
print(f"\n共 {len(mapping)} 条消息")
for k in list(mapping.keys())[:3]:
    print(" ", k)

# 3. 按偏移读取单条消息数组
key = "TMP:202605230600:2 in above ground:forecast"
offset = mapping[key][1]
arr = gribberish.parse_grib_array(raw, offset)
print(f"\n{key} -> raw array shape {arr.shape}")
tmp_2m = arr.reshape(721, 1440)
print("reshape 后:", tmp_2m.shape, f"范围 [{tmp_2m.min():.2f}, {tmp_2m.max():.2f}]")
变量: ['tmp', 'pres', 'dpt']
坐标: ['time', 'latitude', 'longitude']

共 3 条消息
  TMP:202605230600:2 in above ground:forecast
  DPT:202605230600:2 in above ground:forecast
  PRES:202605230600: in surface:forecast

TMP:202605230600:2 in above ground:forecast -> raw array shape (1038240,)
reshape 后: (721, 1440) 范围 [205.34, 317.24]
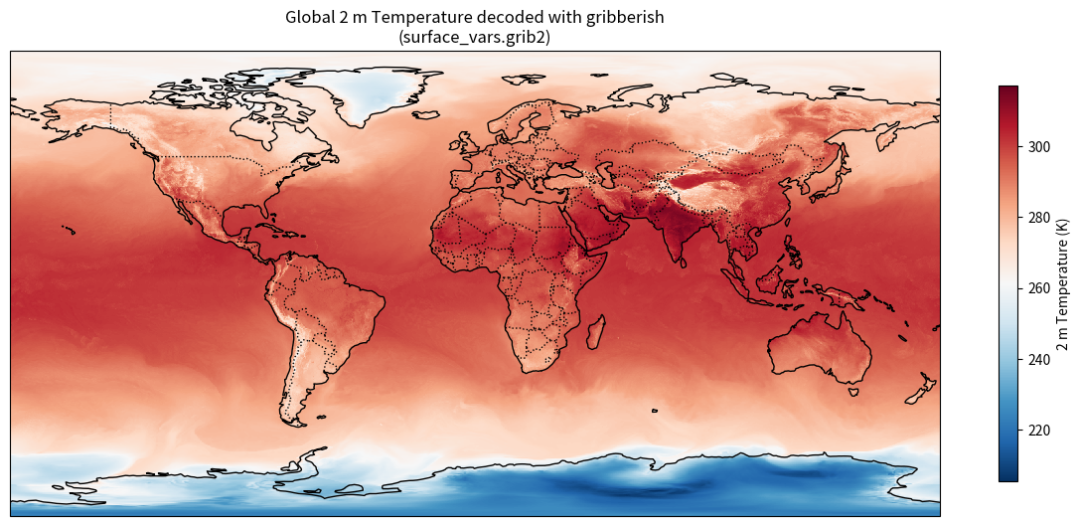
7. 可视化实战:全球 2 m 温度
下面用 cartopy 把 surface_vars.grib2 中的 tmp(2 m 温度)画成全球填色图。gribberish 输出的 longitude 范围是 0°~360°,为了地图显示更自然,我们把它转换到 -180°~180° 并重排数据。
import matplotlib.pyplot as plt
import cartopy.crs as ccrs
import cartopy.feature as cfeature
import numpy as np

fig = plt.figure(figsize=(12, 6))
ax = fig.add_subplot(1, 1, 1, projection=ccrs.PlateCarree())

lon = ds_surf.longitude.values
lat = ds_surf.latitude.values
data = ds_surf["tmp"].isel(time=0).values

# 0-360 -> -180-180 并排序
lon_shifted = ((lon + 180) % 360) - 180
order = np.argsort(lon_shifted)
lon_sorted = lon_shifted[order]
data_sorted = data[:, order]

im = ax.pcolormesh(lon_sorted, lat, data_sorted, transform=ccrs.PlateCarree(), cmap="RdBu_r")
ax.coastlines()
ax.add_feature(cfeature.BORDERS, linestyle=":")
ax.set_global()
plt.colorbar(im, ax=ax, label="2 m Temperature (K)", shrink=0.7)
ax.set_title("Global 2 m Temperature decoded with gribberish\n(surface_vars.grib2)")
plt.tight_layout()
plt.show()
output
output
8. 可视化实战:多等压面层切片
t_q_levels.grib2 包含温度(tmp)和比湿(spfh)在 300/500/700/850 hPa 四个层次的数据。xarray 的 .sel() 让按层切片非常方便。
ds850 = ds_lev.sel(isobar=85000)

fig, axes = plt.subplots(1, 2, figsize=(16, 6), subplot_kw={"projection": ccrs.PlateCarree()})

for ax, var, cmap, title, unit in [
    (axes[0], "tmp", "RdBu_r", "850 hPa Temperature", "K"),
    (axes[1], "spfh", "YlGnBu", "850 hPa Specific Humidity", "kg kg$^{-1}$"),
]:
    lon = ds850.longitude.values
    lat = ds850.latitude.values
    data = ds850[var].isel(time=0).values

    lon_shifted = ((lon + 180) % 360) - 180
    order = np.argsort(lon_shifted)
    lon_sorted = lon_shifted[order]
    data_sorted = data[:, order]

    im = ax.pcolormesh(lon_sorted, lat, data_sorted, transform=ccrs.PlateCarree(), cmap=cmap)
    ax.coastlines()
    ax.add_feature(cfeature.BORDERS, linestyle=":")
    ax.set_global()
    ax.set_title(title)
    plt.colorbar(im, ax=ax, label=unit, shrink=0.6)

plt.suptitle("GFS 850 hPa Fields decoded with gribberish")
plt.tight_layout()
plt.show()

output
output
9. 性能对比:gribberish vs cfgrib
在完全相同的文件上,分别用 engine="gribberish" 和 engine="cfgrib" 打开并强制读取数据,对比耗时。结果可能因硬件、文件大小而异,但 Rust 后端的解码通常有明显优势。
import time

fname = "/home/mw/input/grib3975/surface_vars.grib2"

t0 = time.time()
ds_g = xr.open_dataset(fname, engine="gribberish")
_ = ds_g["tmp"].values  # 强制读取数据
t_gribberish = time.time() - t0

t0 = time.time()
ds_c = xr.open_dataset(fname, engine="cfgrib")
_ = ds_c["t2m"].values  # 强制读取数据
t_cfgrib = time.time() - t0

print(f"gribberish 打开+读数: {t_gribberish:.4f} s")
print(f"cfgrib     打开+读数: {t_cfgrib:.4f} s")
print(f"提速倍数: {t_cfgrib / t_gribberish:.2f}x")
gribberish 打开+读数: 0.0199 s
cfgrib     打开+读数: 0.0602 s
提速倍数: 3.03x
/opt/conda/lib/python3.11/site-packages/gribberish/gribberish_backend.py:50: UserWarning: Converting non-nanosecond precision datetime values to nanosecond precision. This behavior can eventually be relaxed in xarray, as it is an artifact from pandas which is now beginning to support non-nanosecond precision values. This warning is caused by passing non-nanosecond np.datetime64 or np.timedelta64 values to the DataArray or Variable constructor; it can be silenced by converting the values to nanosecond precision ahead of time.
  return xr.Dataset(
11. 快速对比表格
特性 | gribberish | cfgrib | pygrib | eccodes |
|---|---|---|---|---|
底层语言 | Rust | Python + eccodes(C) | Python + eccodes(C) | C |
pip 安装体积 | 小(预编译 wheel) | 中(需 eccodes 二进制) | 中(需 eccodes 二进制) | 大 |
xarray 后端 | 是 | 是 | 否 | 否 |
直接读取数组 | parse_grib_array | 否 | 是 | codes_get_array |
GRIB1 支持 | 是 | 有限 | 是 | 是 |
写入 GRIB | 否 | 否 | 是 | 是 |
云/Kerchunk 友好 | 是(Zarr/VirtualiZarr) | 有限 | 否 | 否 |
生态成熟度 | 新兴 | 高 | 中 | 高 |
12. 小结与选型建议
- 日常分析 + 可视化:优先用
gribberish的 xarray 后端,API 与 NetCDF 一致,pip 安装轻便。 - 需要写入 GRIB 或处理 GRIB1 复杂模板:仍选
pygrib或eccodes。 - 已有大量基于 cfgrib 的代码:可以并行试用 gribberish,在性能敏感场景替换。
- 云端/虚拟数据集:gribberish 的 Zarr codec 和 VirtualiZarr 集成是独特优势,适合构建 Kerchunk 参考文件系统。
一句话:如果你只是“读 GRIB2 做分析”,gribberish 是短平快的新工具之一。
13. 参考资料
- gribberish GitHub 仓库:https://github.com/mpiannucci/gribberish
- gribberish 官方文档:https://mpiannucci.github.io/gribberish/
- gribberish PyPI:https://pypi.org/project/gribberish/
- cfgrib 文档:https://github.com/ecmwf/cfgrib
- xarray 后端机制:https://docs.xarray.dev/en/stable/internals/how-to-add-new-backend.html
本文参与 腾讯云自媒体同步曝光计划,分享自微信公众号。
原始发表:2026-06-13,如有侵权请联系 cloudcommunity@tencent.com 删除
评论
登录后参与评论
推荐阅读
目录
腾讯云开发者

Copyright © 2013 - 2026 Tencent Cloud. All Rights Reserved. 腾讯云 版权所有
深圳市腾讯计算机系统有限公司 ICP备案/许可证号:粤B2-20090059 ![]() 粤公网安备44030502008569号
粤公网安备44030502008569号
腾讯云计算(北京)有限责任公司 京ICP证150476号 | 京ICP备11018762号