
如何在NSView中实现放大镜
如何在NSView中实现放大镜
提问于 2016-10-03 13:28:45
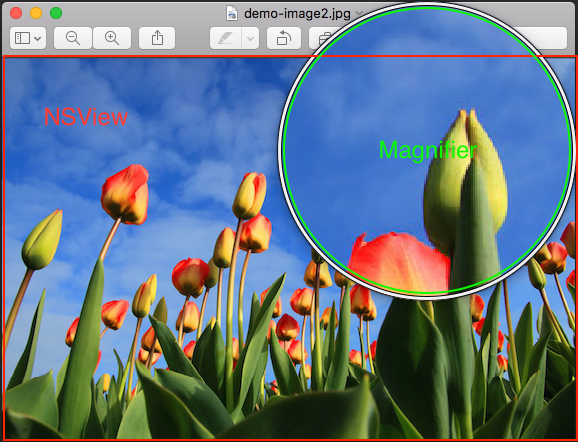
我想在NSView中实现一个看起来像预览的放大镜。
我有几个问题
(1)它在NSView中实现吗?
2)如何实施?
3)如何让放大镜越过视点?
谢谢你帮我
回答 1
Stack Overflow用户
回答已采纳
发布于 2017-07-17 02:14:38
我确实做过这件事,但我是在目标C上做的。
实际上,要做到这一点需要做一些工作,但简而言之:
- 子类NSImageView
- 在子类中,重写、mouseEntered、mouseExited和mouseMoved。
- 在mouseEntered中
NSPoint mouseLoc;
BubbleNSImage * magImg;
BubbleNSImage * magGlass;
mouseLoc = [self convertPoint:[event locationInWindow] fromView:nil];

// Setup the magnifying glass image
magGlass = [[NSImage alloc] initWithData:
               [[NSImage imageNamed:@"magnifierCursor.png"] TIFFRepresentationUsingCompression:NSTIFFCompressionNone factor:0]];

// Get a 4x zoomed verion of a selection around where the mouse is
// set the image for the image view
if( 0 == _zoomMode ){
    magImg = [BubbleNSImage getPixelMultipliedNSImageRegionFromImage:self.image
                                                      withMultiplier:4
                                                        andSubRegion:NSMakeRect(mouseLoc.x - 17,
                                                                                self.image.size.height - mouseLoc.y - 17,
                                                                                34,
                                                                                34)];
}else{
    magImg = [BubbleNSImage getAppleMultipliedNSImageRegionNSImage:self.image
                                                    withMultiplier:4
                                            andInterpolationMethod:_zoomMode
                                                      andSubRegion:NSMakeRect(mouseLoc.x - 17,
                                                                              mouseLoc.y - 17,
                                                                              34,
                                                                              34)];
}


// Mask the 4x zoomed version with a mask made for the zoomer
[magImg maskWithImage:[NSImage imageNamed:@"magnifierCursorMask.png"]
        andMaskOffset:NSMakePoint(0, 0)
         andMaskColor:[NSColor colorWithRed:0 green:0 blue:0 alpha:1]];

// Add the 4x zoomed image behind the magnifying glass image
[magGlass addImageBehind:(NSImage *)magImg
              withOffset:NSMakePoint(16, 16)
       clipToOrigImgSize:NO];

// Preseent the full image as the cursor
[[[NSCursor alloc] initWithImage:(NSImage *)magGlass hotSpot:NSMakePoint(83, 83)] set];
上面代码中的BubbleNSImage是NSImage的一个子类,它允许我对标准的NSImage对象无法使用的NSImages执行一系列操作。正如你所看到的,它允许我使用苹果的不同的内插器进行缩放,以及使用我自己写的像素复制来放大。它允许我设置变焦乘法器,以及我想要放大的子区域。
稍后,它允许我执行掩蔽操作(这是有用的,因为我也使用圆形放大镜,并需要剪辑在圆圈外。
然后,它允许我执行覆盖操作,在那里,我采取剪裁放大图像,并把它放在我的放大镜图像。
最后,您需要使用新创建的图像初始化一个新的游标对象,然后将其设置为当前游标。
- 相同的代码需要在重载的mouseMoved方法中.
- 您需要在重载的mouseExited方法中将光标设置为正常值。
目标-C代码:
-(void)mouseExited:(NSEvent *)event{
    [[NSCursor arrowCursor] set];
}
有相当多的例子代码,用于执行许多图像处理功能,我有上面的高级算法。
页面原文内容由Stack Overflow提供。腾讯云小微IT领域专用引擎提供翻译支持
原文链接:
https://stackoverflow.com/questions/39832849
复制相关文章
相似问题
腾讯云开发者

Copyright © 2013 - 2026 Tencent Cloud. All Rights Reserved. 腾讯云 版权所有
深圳市腾讯计算机系统有限公司 ICP备案/许可证号:粤B2-20090059 ![]() 粤公网安备44030502008569号
粤公网安备44030502008569号
腾讯云计算(北京)有限责任公司 京ICP证150476号 | 京ICP备11018762号