
Umbraco 8后台使用IdentityServer4登录
背景
我对Umbraco非常陌生,但我一直试图将IdentityServer4用于Umbraco的BackOffice。对于IDP,我使用了内存中的配置(is4inmem模板)找到了这里。
对于Umbraco,我使用UmbracoIdentityExtensions来配置OpenId连接。
我一直在学习这教程(不过,这是针对Umbraco 7的)。
问题
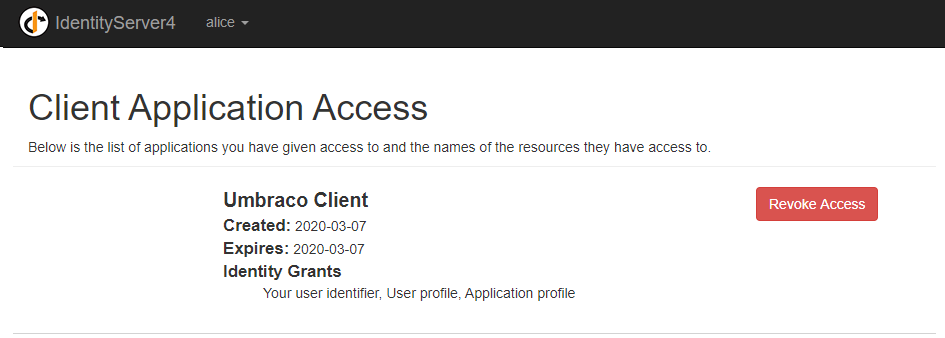
我确实配置了“使用OpenId连接登录”按钮,但是当我尝试使用IDP登录时,Umbraco不会登录。我一直被送回登录页面。然而,每当我访问IDP页面时,我都会登录,并且可以看到我已经给出了访问权限,如下图所示。
每当我用Umbraco帐户登录,然后尝试‘链接您的OpenId连接帐户’时,它什么也不做,但是在登录时,屏幕上会出现一条错误消息:“发生了错误,无法获得外部登录信息”--我尝试使用不同的配置设置,但没有成功。
码
国内流离失所者Config.cs
public static IEnumerable<IdentityResource> Ids =>
            new IdentityResource[]
            {
                new IdentityResources.OpenId(),
                new IdentityResources.Profile(),
                new IdentityResources.Email(),
                new IdentityResource(
                    name: "application.profile",
                    displayName: "Application profile",
                    claimTypes: new[] { ClaimTypes.GivenName, ClaimTypes.Surname }
                )
            };

... etc ...

 public static IEnumerable<Client> Clients =>
            new Client[]
            {
                new Client
                {
                    ClientId = "u-client-bo",
                    ClientSecrets = new List<Secret>
                    {
                        new Secret("secret".Sha256()),
                    },
                    ClientName = "Umbraco Client",
                    AllowedGrantTypes = GrantTypes.Hybrid,
                    RequireConsent = false,
                    RedirectUris           = { "https://localhost:44302/Umbraco" },
                    PostLogoutRedirectUris = { "https://localhost:44302/Umbraco" },
                    AllowedScopes =
                    {
                        IdentityServerConstants.StandardScopes.OpenId,
                        IdentityServerConstants.StandardScopes.Profile,
                        IdentityServerConstants.StandardScopes.Email,
                        "application.profile",
                    },
                    AllowAccessTokensViaBrowser = true,
                    AlwaysIncludeUserClaimsInIdToken = false
                }
            };
对于Umbraco,我已经将UmbracoCustomOwinStartup编辑为:
public class UmbracoCustomOwinStartup : UmbracoDefaultOwinStartup
{
    protected override void ConfigureUmbracoUserManager(IAppBuilder app)
    {
        app.ConfigureUserManagerForUmbracoBackOffice(
            Services,
            Mapper,
            UmbracoSettings.Content,
            GlobalSettings,

            global::Umbraco.Core.Security.MembershipProviderExtensions.GetUsersMembershipProvider().AsUmbracoMembershipProvider());
    }

    protected override void ConfigureUmbracoAuthentication(IAppBuilder app)
    {
        app
            .UseUmbracoBackOfficeCookieAuthentication(UmbracoContextAccessor, RuntimeState, Services.UserService, GlobalSettings, UmbracoSettings.Security, PipelineStage.Authenticate)
            .UseUmbracoBackOfficeExternalCookieAuthentication(UmbracoContextAccessor, RuntimeState, GlobalSettings, PipelineStage.Authenticate)
            .UseUmbracoPreviewAuthentication(UmbracoContextAccessor, RuntimeState, GlobalSettings, UmbracoSettings.Security, PipelineStage.Authorize);

        var identityOptions = new OpenIdConnectAuthenticationOptions
        {
            ClientId = "u-client-bo",
            SignInAsAuthenticationType = DefaultAuthenticationTypes.ExternalCookie,
            Authority = "https://localhost:44393",
            RedirectUri = "https://localhost:44302/Umbraco",
            ResponseType = "code id_token token",
            Scope = "openid profile application.profile",
            PostLogoutRedirectUri = "https://localhost:44302/Umbraco",

            Notifications = new OpenIdConnectAuthenticationNotifications
            {
                SecurityTokenValidated = ClaimsTransformer.GenerateUserIdentityAsync
            }
        };

        // Configure BackOffice Account Link button and style
        identityOptions.ForUmbracoBackOffice("btn-microsoft", "fa-windows");
        identityOptions.Caption = "OpenId Connect";

        // Configure AutoLinking
        identityOptions.SetExternalSignInAutoLinkOptions(
            new ExternalSignInAutoLinkOptions(autoLinkExternalAccount: true));

        app.UseOpenIdConnectAuthentication(identityOptions);
    }
}
ClaimsTransformer.GenerateUserIdentityAsync方法向标识添加附加声明。
是否缺少其他配置或组件?
提前感谢!
回答 1
Stack Overflow用户
发布于 2020-03-09 17:53:18
我终于想出来了。有几个问题:
1.更正auth cookie
现在,我不再使用DefaultAuthenticationTypes.ExternalCookie作为SignInAsAuthenticationType,而是使用Umbraco.Core.Constants.Security.BackOfficeExternalAuthenticationType。
2.设置AuthenticationType
在AuthenticationType中设置OpenIdConnectAuthenticationOptions。为了使自动链接工作,它必须匹配Authority的名称.
重要:在identityOptions.ForUmbracoBackOffice("btn-microsoft", "fa-windows");之后显式地设置它,因为它在方法调用后用'Umbraco.'作为前缀。
3.包括电子邮件声明
我增加了电子邮件声明,这也是自动链接的工作要求。
Scope = "openid email profile application.profile",
4.确保您有任何形式的名称声明
我已经在IDP中将AlwaysIncludeUserClaimsInIdToken设置为true,因此id声明在Umbraco中自动获得。我的ClaimsTransformer现在看起来是这样的:
public class ClaimsTransformer
{
    public static async Task GenerateUserIdentityAsync(
        SecurityTokenValidatedNotification<OpenIdConnectMessage, OpenIdConnectAuthenticationOptions> notification)
    {
        // Now this contains ID claims (e.g. GivenName in my case)
        var id = notification.AuthenticationTicket.Identity;

        var identityUser = new ClaimsIdentity(
            id.Claims, // copy the claims I have
            notification.AuthenticationTicket.Identity.AuthenticationType,
            // set the nameType, so Umbraco can use the 'ExternalLogin.Name' for auto-link to work
            ClaimTypes.GivenName, // <-- You have to set a correct nameType claim
            ClaimTypes.Role);

         notification.AuthenticationTicket = new AuthenticationTicket(identityUser,
                notification.AuthenticationTicket.Properties);
    }
}
5.删除其他Umbraco中间件
在我的例子中,不需要app.UseUmbracoBackOfficeXXX语句,实际上,它们破坏了功能。我的UmbracoCustomOwinStartup现在看起来是这样的:
public class UmbracoCustomOwinStartup : UmbracoDefaultOwinStartup
{
    protected override void ConfigureUmbracoAuthentication(IAppBuilder app)
    {
        base.ConfigureUmbracoAuthentication(app);

        var identityOptions = new OpenIdConnectAuthenticationOptions
        {
            ClientId = "u-client-bo",
            SignInAsAuthenticationType = Umbraco.Core.Constants.Security.BackOfficeExternalAuthenticationType,
            AuthenticationType = "https://localhost:44393",
            Authority = "https://localhost:44393",
            RedirectUri = "https://localhost:44302/Umbraco",
            ResponseType = "code id_token token",
            Scope = "openid email profile application.profile",
            PostLogoutRedirectUri = "https://localhost:44302/Umbraco",

            Notifications = new OpenIdConnectAuthenticationNotifications
            {
                SecurityTokenValidated = ClaimsTransformer.GenerateUserIdentityAsync
            }
        };

        // Configure BackOffice Account Link button and style
        identityOptions.ForUmbracoBackOffice("btn-microsoft", "fa-windows");
        identityOptions.Caption = "OpenId Connect";

        identityOptions.AuthenticationType = "https://localhost:44393";

        // Configure AutoLinking
        identityOptions.SetExternalSignInAutoLinkOptions(
            new ExternalSignInAutoLinkOptions(autoLinkExternalAccount: true));

        app.UseOpenIdConnectAuthentication(identityOptions);
    }

}提示:不要忘记在您的web.config中使用正确的OWIN启动。
我希望你们中的一些人觉得这很有帮助,我找不到很多关于Umbraco 8和IdentityServer4的文档。
https://stackoverflow.com/questions/60577872
复制相似问题
腾讯云开发者

Copyright © 2013 - 2026 Tencent Cloud. All Rights Reserved. 腾讯云 版权所有
深圳市腾讯计算机系统有限公司 ICP备案/许可证号:粤B2-20090059 ![]() 粤公网安备44030502008569号
粤公网安备44030502008569号
腾讯云计算(北京)有限责任公司 京ICP证150476号 | 京ICP备11018762号